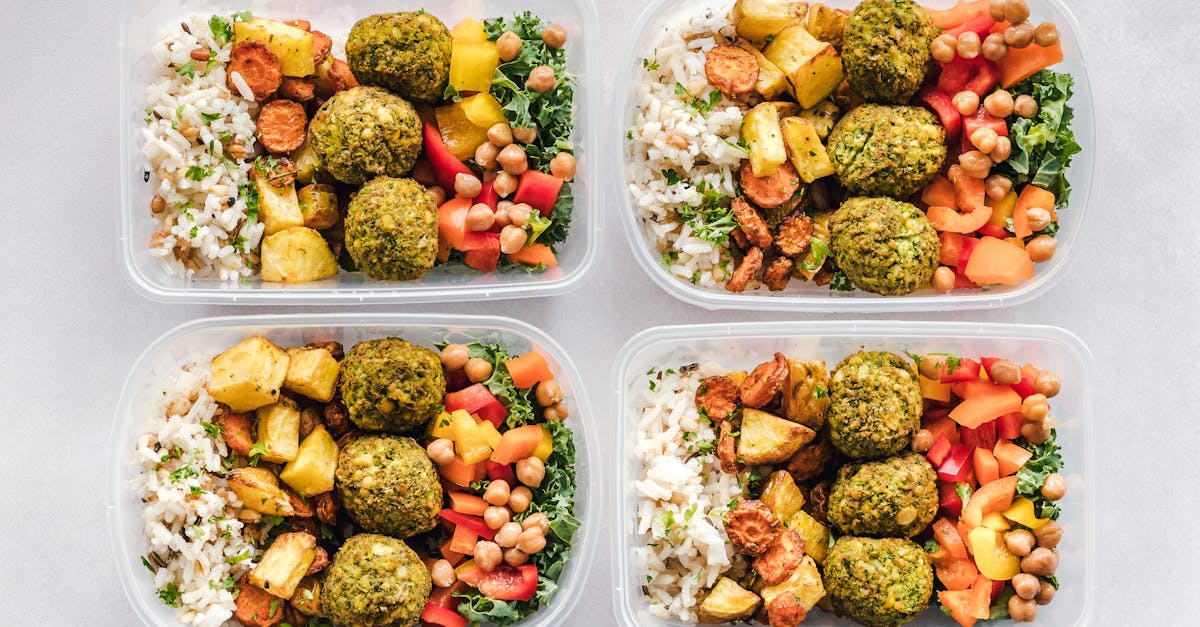
I’ve been a meal prep enthusiast for years. The idea of saving time, money, and eating healthier throughout the week by preparing meals in advance always sounded like a winning strategy. And it is – in theory. The reality, however, often hit me around Wednesday, when that perfectly portioned salad I prepped on Sunday looked less like a vibrant, fresh meal and more like a soggy, sorry excuse for lunch. Or that stir-fry that was supposed to last until Friday, but tasted stale by Thursday. The culprit, I realized after countless disappointments, wasn’t my cooking or my planning. It was the containers I was using.
Like many, I initially gravitated towards cheap, stackable plastic containers. They were everywhere, affordable, and seemed perfectly adequate. But over time, I noticed a pattern: they warped in the dishwasher, stained with tomato sauce, retained odors, and, most importantly, failed to keep my food fresh. It felt like I was constantly battling condensation, strange smells, and premature spoilage. I was spending precious weekend hours cooking, only for the food to lose its appeal halfway through the week. It was frustrating and inefficient, undermining the very purpose of meal prepping.
This experience led me on a quest to understand why most meal prep containers fail us and, more importantly, what actually works. What I discovered was a blend of material science, design principles, and practical considerations that, once understood, can transform your meal prep game. It’s not just about aesthetics; it’s about preserving texture, flavor, and preventing food waste. You spend valuable time and effort preparing these meals; don’t let your containers sabotage your hard work.
Key Takeaways
- Generic plastic containers often fail due to poor seals, material degradation, and inability to maintain optimal food environments.
- Investing in quality glass containers or specific plastic options with superior sealing mechanisms is crucial for long-lasting freshness.
- Understanding food-specific storage needs and using appropriate container features like vents or dividers dramatically extends meal appeal.
- Proper container maintenance, including handwashing specific types and replacing worn seals, ensures consistent performance and hygiene.
The Leaky Truth About Most Plastic Containers
When I first started meal prepping, my kitchen cabinet was a chaotic tower of mismatched plastic containers. They were lightweight, cheap, and seemed like a no-brainer. “Stackable! Microwave safe! Dishwasher safe!” the labels proudly proclaimed. But the reality was far from ideal. The biggest issue I consistently faced was their inability to create and maintain a truly airtight seal. I would pack a vibrant pasta salad, only to find a pool of dressing seeping into my lunch bag by lunchtime, or a dry, unappetizing layer forming on top of my rice dish.
Here’s what I learned: many budget-friendly plastic containers use flimsy lids and basic latching mechanisms that simply aren’t designed for long-term freshness. They might feel like they’re sealed, but microscopic air gaps allow oxygen to infiltrate, leading to oxidation, moisture loss (or gain, depending on the food), and ultimately, spoilage. Over time, plastic also degrades. Repeated heating and cooling, exposure to acidic foods, and harsh dishwashing cycles can cause the plastic to warp, crack, and become porous. This not only further compromises the seal but also makes the container a breeding ground for bacteria and odors. That persistent smell of last week’s chili that just won’t wash out? That’s a sign of material degradation and odor absorption, and it’s certainly not doing your current meal any favors.
In my experience, the only plastic containers that consistently perform well are those designed with true airtight and leak-proof technology. Look for containers with thick, flexible silicone gaskets embedded in the lid and robust locking tabs (typically four on each side) that create significant pressure. These aren’t the cheapest options, but they are a worthwhile investment. For example, I found brands that explicitly state ‘leak-proof’ and feature these gasket and latch designs actually live up to the promise. I put them to the test with soup – a true container challenge – and they passed. If a container can hold soup without a single drip, it can certainly keep your stir-fry fresh.
The Glass Advantage: Why It’s Often Worth the Weight
After years of battling with plastic, I made a significant shift: I invested in a full set of glass meal prep containers. This decision, though initially more expensive and heavier, completely changed my meal prep experience. The difference in food quality and longevity was immediate and undeniable.
Glass offers several inherent advantages that make it superior for food storage. First and foremost, it’s non-porous. This means it won’t absorb food odors or stains, no matter how pungent your curry or how vibrant your tomato sauce. I’ve stored everything from kimchi to salmon in glass containers, and they always come out of the dishwasher sparkling clean and odor-free, ready for the next meal. This alone vastly improves the appeal of your food later in the week – nobody wants their chicken to faintly taste like last week’s fish.
Secondly, glass is incredibly stable across temperature changes. You can take it straight from the fridge to the microwave or oven (without the lid, of course) without worrying about warping or chemicals leaching into your food. This convenience makes reheating effortless and safer. I’ve often prepped casseroles directly in my glass containers, baked them, cooled them, and then stored them. Reheating involves simply popping the container (lid off!) back into the oven or microwave. This versatility is a huge time-saver and reduces the need for extra dishes.
The weight of glass is often cited as a drawback, and it’s true, a stack of glass containers can be hefty. For those who commute long distances or carry multiple meals, this can be a consideration. However, I’ve found the trade-off for superior freshness and durability to be well worth it. Modern glass containers are often made from borosilicate glass, which is surprisingly robust and less prone to shattering than regular glass. Many come with silicone-sleeved lids or robust plastic lids with silicone gaskets that provide an excellent seal. In my experience, the ones with four-latch locking mechanisms are the gold standard for creating that essential airtight barrier. If you’re serious about freshness and tired of container issues, glass is the best investment you can make.
Design Matters: Beyond Just a Seal
While an airtight seal is paramount, it’s not the only factor in maintaining food freshness. The internal design of your meal prep containers plays a significant role, particularly for certain types of food. This is where I learned to be more strategic with my container choices, rather than relying on a one-size-fits-all approach.
Compartmentalized containers were a game-changer for me when prepping meals with multiple components. Think about a meal like chicken with roasted vegetables and a side of quinoa. If all these elements are jumbled together in a single compartment, the moisture from the chicken can make the vegetables soggy, or the quinoa might absorb too much liquid. Compartments, however, allow each component to maintain its integrity, texture, and flavor. I specifically look for glass containers with two or three divided sections. These are perfect for keeping sauces separate, preventing cross-contamination of flavors, and ensuring that everything reheats beautifully without becoming a uniform mush.
Another often-overlooked feature is the presence of vented lids. While an airtight seal is crucial for storage, it can sometimes work against you during reheating, especially in the microwave. Trapped steam can overcook food, make it rubbery, or cause pressure buildup. Containers with small, sealable vents on the lid allow you to release steam during reheating without having to completely remove the lid, which can be messy and inefficient. I’ve found these particularly useful for rice dishes or anything prone to becoming overly soft and mushy with steam. Just remember to close the vent again before storing!
Finally, consider the shape and depth of your containers. Wider, shallower containers are excellent for even cooling and reheating of foods like pasta or stir-fries, preventing hot spots and ensuring a uniform temperature. Deeper, narrower containers might be better for soups or stews where liquid volume is key. By matching the container design to the food you’re prepping, you actively optimize for freshness, texture, and an enjoyable eating experience. It’s about being intentional with your tools, not just having a collection of boxes.
The Unsung Hero: Proper Lid Care and Maintenance
I used to be guilty of throwing all my meal prep containers and lids into the dishwasher without a second thought. My thinking was, “they’re dishwasher safe, so they’ll be fine!” While many are, I eventually learned that diligent lid care, especially for those with silicone gaskets, is the unsung hero in the fight for lasting food freshness.
The flexible silicone gaskets that make containers truly airtight and leak-proof are also their most vulnerable component. Over time, these gaskets can collect food particles, grease, and even mold, especially if not thoroughly cleaned. I noticed a subtle, slightly off-putting smell emanating from some of my older container lids, even after a dishwasher cycle. Upon closer inspection, I realized it was food residue trapped under the gasket.
My routine changed: I now periodically remove the silicone gaskets from my glass container lids (most quality ones are designed to be removable) and wash them separately by hand. A small brush or even an old toothbrush works wonders for getting into the crevices. I then let both the gasket and the lid air dry completely before reassembling. This prevents moisture buildup and ensures no hidden food particles are left to fester. For plastic lids with non-removable gaskets, extra attention during handwashing is crucial, perhaps using a bottle brush to thoroughly scrub the seal area. This simple act of maintenance extends the lifespan of your containers and, more importantly, keeps your food tasting as fresh as possible.
Also, keep an eye on the condition of your gaskets. If they start to crack, tear, or lose their elasticity, the airtight seal will be compromised. This is a clear sign it’s time to replace the lid, or if possible, just the gasket itself. Some manufacturers offer replacement gaskets, which is a very cost-effective way to extend the life of an otherwise perfectly good container. Prioritizing this small, consistent effort in maintenance has been key to consistent meal prep success for me.
Rethinking Your Meal Prep Strategy for Longevity
Beyond just the containers themselves, I realized that my approach to meal prep needed a slight adjustment to truly maximize freshness. It’s a holistic system, not just a set of isolated actions. Thinking about the entire lifecycle of the prepped meal, from cooking to consumption, made a significant difference.
One of the most impactful changes I made was to cool food completely before sealing and storing. Packing warm food into an airtight container creates condensation, which in turn leads to soggy textures and an environment ripe for bacterial growth. My rule of thumb is to let everything come to room temperature (usually about 1-2 hours) before putting on the lid and refrigerating. For larger batches, I might even spread food out on a baking sheet to speed up cooling before portioning into containers. This simple step makes a massive difference in preventing that dreaded “soggy-bottom” syndrome.
I also started to separate components strategically. While compartmentalized containers help, sometimes you need to go a step further. For example, salad dressings, croutons, and delicate leafy greens should never be stored together in a single container for more than a few hours. I use tiny separate containers for dressings and keep croutons in a small zip-top bag, adding them right before eating. Similarly, if I’m prepping tacos, I’ll store the cooked meat, cheese, and salsa in separate containers, and the tortillas in their own airtight bag. This extra effort ensures that each element retains its optimal texture and prevents everything from turning into a sad, indistinguishable mess.
Finally, consider batching ingredients instead of full meals for some items. Instead of prepping five identical chicken and veggie bowls, I might roast a large batch of chicken, chop a week’s worth of vegetables, and cook a big pot of grains. Then, I can assemble different combinations on demand, or create partial meals to be finished with a quick cook-up on the day. This provides flexibility, variety, and often means the components stay fresher for longer because they haven’t been combined until just before eating. It adds a layer of effort to daily assembly, but it drastically improves food enjoyment and reduces waste for me.
The Cost of Skimping: Why Cheap Containers Are a False Economy
Looking back, my initial approach to buying meal prep containers was shortsighted. I saw the low price tag of a 10-pack of flimsy plastic containers and thought I was being economical. In reality, I was engaging in a false economy, repeatedly spending money on items that consistently underperformed and contributed to food waste.
Consider the hidden costs of cheap containers: first, the cost of spoiled food. If half your prepped meals become unappetizing or unsafe to eat by midweek, you’re essentially throwing away money you spent on groceries. A few dollars saved on containers quickly gets eclipsed by wasted food. Second, the cost of constant replacement. Those cheap plastic containers warp, stain, crack, and retain odors, forcing you to buy new ones every few months. This cycle of repurchase adds up, often exceeding the cost of a single set of quality containers over time. I probably spent more on multiple sets of inadequate plastic over two years than I did on my current durable glass collection.
Third, there’s the opportunity cost of time and effort. You dedicate hours on your weekend to grocery shopping, cooking, and portioning. When your containers fail, that effort feels wasted. It can be incredibly demotivating and make you question the entire practice of meal prepping. This psychological drain can lead you to abandon meal prep altogether, losing out on all the benefits it could provide.
My experience has taught me that investing in high-quality, durable containers – particularly glass with robust, gasketed lids – is not an expense, but an investment. A good set might cost $50-$100 upfront, but they will last for years, maintain food freshness, reduce waste, and make your meal prep efforts genuinely rewarding. This isn’t about being wasteful with money; it’s about being strategic. Buy well, buy once, and enjoy fresher food for longer. This simple shift in perspective saves money, reduces stress, and makes healthy eating genuinely sustainable.
Frequently Asked Questions
Q: Are all plastic meal prep containers bad?
A: Not all. While many budget plastic containers lack effective seals and degrade quickly, high-quality plastic containers designed with robust locking tabs and silicone gaskets can be very effective. Look for BPA-free, freezer-safe, and microwave-safe options from reputable brands known for their leak-proof designs. However, glass generally outperforms plastic in terms of odor and stain resistance and longevity.
Q: What’s the best material for meal prep containers?
A: For overall performance, durability, and food freshness, glass is generally considered the best material. It’s non-porous, doesn’t absorb odors or stains, is oven/microwave safe (without lid), and lasts a long time. High-quality plastic with strong seals and stainless steel (for non-microwaveable items) are also excellent choices.
Q: How do I prevent my prepped meals from getting soggy?
A: Several strategies help: 1) Cool food completely before sealing and refrigerating. 2) Use compartmentalized containers to keep wet and dry ingredients separate. 3) For salads, pack dressing, croutons, and delicate greens separately and combine just before eating. 4) Avoid overcooking vegetables, aiming for slightly al dente so they don’t break down further in storage.
Q: Can I put hot food directly into meal prep containers?
A: It’s best to avoid this. Placing hot food directly into an airtight container, especially plastic, can create excess condensation that leads to soggy food and encourages bacterial growth. Always allow food to cool to room temperature before sealing and refrigerating. For glass containers, sudden extreme temperature changes can also risk thermal shock, though borosilicate glass is more resistant.
Q: How do I get rid of lingering smells or stains in my containers?
A: For plastic containers, stains and odors are common due to porosity. Try soaking them in a solution of baking soda and water or a mixture of white vinegar and water. For tough stains, leaving them in direct sunlight can sometimes help. For glass containers, stains and odors are rarely an issue due to their non-porous nature; thorough washing (and occasional gasket removal) is usually sufficient.
Q: How often should I replace my meal prep containers?
A: Quality glass containers can last for many years if cared for properly. High-quality plastic containers might last 1-3 years before seals degrade or warping becomes an issue. Cheaper plastic containers might need replacement every 6-12 months. Pay attention to signs of wear: warped lids, degraded seals, persistent odors, cracks, or excessive staining indicate it’s time for a replacement to ensure food safety and freshness.
Conclusion
Meal prepping is a powerful tool for a healthier, more productive life, but its effectiveness hinges significantly on the quality of your containers. My journey from soggy salads to genuinely fresh midweek meals was a direct result of understanding that not all containers are created equal. Skimping on these essential tools is a false economy that leads to food waste, frustration, and ultimately, a missed opportunity for consistent healthy eating.
Invest in quality. Opt for durable glass with robust, gasketed, locking lids whenever possible. Be strategic about your container choices, considering compartmentalization and ventilation for different meal types. And crucially, don’t neglect the simple but vital act of proper cleaning and maintenance for your lids and gaskets. By making these intentional shifts, you’ll transform your meal prep experience from a weekly battle against spoilage into a seamless, rewarding habit that truly supports your wellness and productivity goals. Your future self (and your taste buds) will thank you for it.
Est. reading time: 11 min read
Filed By
Eleanor Vance
Productivity & Time Management
A former lifestyle editor with a keen eye for efficiency and personal development.